
Automate deploy of your Orchard CMS to Azure
Automation when it comes to deploying web applications is very important. Automation when it comes to Azure, is an absolute neccesity. You can't live without it. What you need is one click deploy of your latest changes or you will have deploy hell every time you want to release a bug fix.
It is hard deploying your application to Azure. It is very hard because
- When your WebRole won't start you are most often without any error cause
- Logging is not intuitive and it is hard to get diagnostics out of your application
- You can't just remote in and switch some DLL, you need to deploy a complete new package
- You want to work with ntfs filesystem and SQL express locally during development, but have to use Azure storage and Azure SQL in Azure
This is why a lot of steps are needed to create a new deployment, and that knowledge is best preserved in an automated script.
My Orchard CMS Solution
I have three projects in my solution.
- LiteMedia.Web - this is my Orchard project
- LiteMedia.Web.Lib - this is a project for custom classes that I need in my project
- LiteMedia.Web.Azure - this is an Azure project that I use for deployment

Azure specific Orchard Configuration
There are some configurations that I don't want to use when I develop locally, but that is needed when I deploy to Azure. I place these files outside the source control tree in its own directory structure, so I can copy them into the project just before deploy.
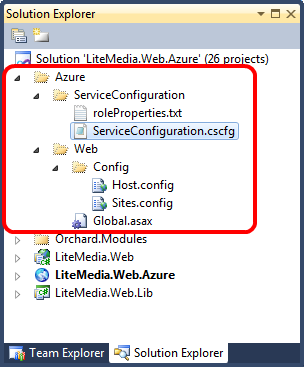
First are the host.config and sites.config in the Config directory. They should look something like this.
config/host.config
config/sites.config
And then you also need to bootstrap Azure storage in your Global application file. I have one local Global file that I use for debugging, and then I have one AzureApplication that I only use when deployed to Azure. I control which one to use by specifying it in Global.asax of course and switching that out during deployment. My local Global.asax looks like this
<%@ Application Codebehind="Global.asax.cs" Inherits="Orchard.Web.MvcApplication" Language="C#" %>
and my Global.asax á la Azure looks like this.
<%@ Application Inherits="LiteMedia.Web.Lib.AzureApplication" Language="C#" %>
CodeBehind for LiteMedia.Web.Lib.AzureApplication class looks like this.
namespace LiteMedia.Web.Lib { public class AzureApplication : HttpApplication { public static void RegisterRoutes(RouteCollection routes) { routes.IgnoreRoute("{resource}.axd/{*pathInfo}"); }
    protected void Application_Start()
    {
        CloudStorageAccount.SetConfigurationSettingPublisher(
            (configName, configSetter) =>
                configSetter(RoleEnvironment.GetConfigurationSettingValue(configName))
            );

        // For information on handling configuration changes
        // see the MSDN topic at http://go.microsoft.com/fwlink/?LinkId=166357.
        RoleEnvironment.Changing += (sender, e) =>
        {
            // If a configuration setting is changing
            if (e.Changes.Any(change => change is RoleEnvironmentConfigurationSettingChange))
            {
                // Set e.Cancel to true to restart this role instance
                e.Cancel = true;
            }
        };

        RegisterRoutes(RouteTable.Routes);
        Starter.LaunchStartupThread(MvcSingletons);
    }

    protected void Application_BeginRequest()
    {
        Context.Items["originalHttpContext"] = Context;
        Starter.OnBeginRequest(Context, MvcSingletons);
    }

    protected void Application_EndRequest()
    {
        Starter.OnEndRequest();
    }

    static void MvcSingletons(ContainerBuilder builder)
    {
        builder.Register(ctx => RouteTable.Routes).SingleInstance();
        builder.Register(ctx => ModelBinders.Binders).SingleInstance();
        builder.Register(ctx => ViewEngines.Engines).SingleInstance();
    }
}
}
Notice the CloudStorageAccount calls and the RoleEnvironment.Changing event that we need to have set in Azure.
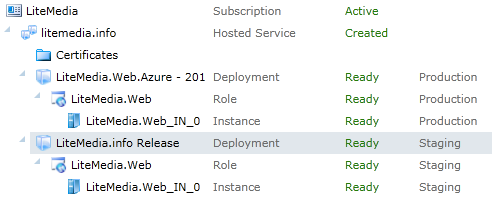
One click deploy to Azure
Before we start automating you should make sure that you can create a staging environment, production environment of your application and have them up and running. This will help you alot before you start thinking about automation.
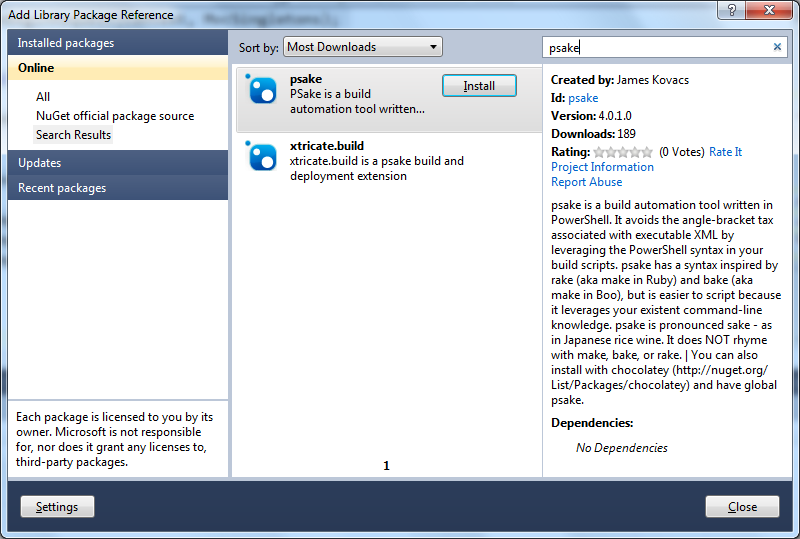
I use psake as a build script. This is mostly because psake is Powershell and there are Windows Azure Platform PowerShell Cmdlets. Easiest way to get psake into your project is through NuGet.
Create a new powershell script called default.ps1 in your root source directory and add an easy to execute cmd file too.
powershell .\Source\packages\psake.4.0.1.0\tools\psake.ps1 "default.ps1" "DeployToAzure" "4.0"
This executes the "DeployToAzure" task in default.ps1 which builds the project with .NET 4.0.
The powershell default.ps1 psake script
I will describe my build script one portion of a time. It is quite simple really.
The tools version of msbuild
$framework = '4.0'
properties { # Build a release build (compared to Debug) $configuration = 'Release'
# Tools executables $bincspack = "C:\Program Files\Windows Azure SDK\v1.4\bin\cspack.exe" $bincsrun = "C:\Program Files\Windows Azure SDK\v1.4\bin\csrun.exe"
# Current working directory $cwd = [System.IO.Directory]::GetCurrentDirectory() + ''
# Directories we use for the build $dirbuild = $cwd + 'Build' $dircompile = $dirbuild + 'Compile' $dirpackage = $dirbuild + 'Package' $dirtest = $dirbuild + 'Test' $dirdeploy = $dirbuild + 'Deploy' $dirapproot = $dir_package + "LiteMedia.Web.Azure.csx\roles\LiteMedia.Web\approot"
# Source directories $dirsource = $cwd + 'Source' $dirweb = $dirsource + 'Main\LiteMedia.Web' $dirazure = $dir_source + 'Main\LiteMedia.Web.Azure'
# Orchard CMS project file and Azure project $webcsproj = $dirweb + 'LiteMedia.Web.csproj' $azureccproj = $dirazure + 'LiteMedia.Web.Azure.ccproj'
# Specific Orchard Azure configuration $dirazureconfiguration = $cwd + 'Azure' $azureweb = $dirazureconfiguration + 'Web*' $azureserviceconfiguration = $dirazureconfiguration + 'ServiceConfiguration\ServiceConfiguration.cscfg' $azureroleproperties = $dir_azureconfiguration + 'ServiceConfiguration\roleProperties.txt'
# Azure variables $azureservice = "litemediainfo" $azuresub = "a8bdaa82-4fa3-4434-8b30-066553bc1c3e" $azurecert = Get-Item "cert:\CurrentUser\My\089E7878658AB876CCAB876AB8768BA687B6ADAD" $azurepackage = "$dirdeploy\LiteMedia.Web.Azure.cspkg" $azureconfig = "$azureserviceconfiguration" $azurelabel = "litemedia.info " + [System.DateTime]::Now.ToString() $azurerole = "litemedia.info" $azurestorage = "litemedia" }
These are a lot of variable declarations. It should be quite clear to you their uses, except maybe the $azure_cert.
The certificate for deployment
You need a certification to deploy things to Azure. Think of it as your username/password. It's easiest to create this through the Visual Studio deploy tool, and just add it to the Azure management console.
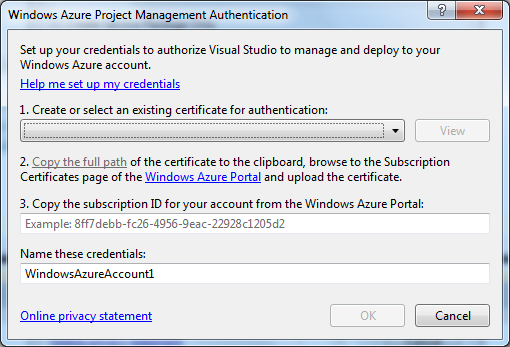
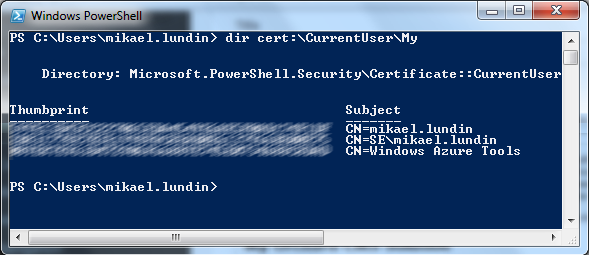
But how do you find out that thumbprint? Well, you can get it from Azure or just list the available certificates with powershell like
dir cert:\CurrentUser\My
Build tasks
task Clean { # If build dir exists, delete it if (Test-Path $dirbuild) { rd $dirbuild -Recurse -Force }
# Recreate build target directories md $dirbuild md $dircompile md $dirpackage md $dirtest md $dir_deploy }
The default target of this build script is just to compile. The clean task is just cleaning away any previous build to make sure that we have a fresh target to build to.
Just making sure that the project compiles before we start building Azure packages and whatnot.
# Copy Orchard specific Azure configuration to AppRoot cp $azureweb $dirapproot -Recurse -Force
Write-Host "Create Azure Package" &$bincspack /role:"LiteMedia.Web;$dirapproot;LiteMedia.Web.dll" /rolePropertiesFile:"LiteMedia.Web;$azureroleproperties" "$dirpackage\LiteMedia.Web.Azure.csx\ServiceDefinition.build.csdef" /out:"$dir_deploy\LiteMedia.Web.Azure.cspkg"
# Copy the ServiceConfiguration file to deploy directory cp $azureserviceconfiguration $dirdeploy }
First we use the Azure project to build the actual approot that will be used in Azure. This is great for debugging purposes as you can make sure that all the assemblies are deployed as they should be. Next we'll apply the Orchard specific configuration by copying it in from our static folder outside of the source control. Last we create the cspkg-file. I'm not sure if the roleProperties is really needed, but I use it because I got the recommendation from another blog.
When this step is done you should have an Azure package in the deploy directory, and the service configuration. Before you start automating the deploy you should test these on a staging environment and make sure that they work OK.
#Set to running
Get-HostedService -serviceName $azureservice -subscriptionId $azuresub -certificate $azure_cert | Get-Deployment -slot Staging | Set-DeploymentStatus running | Get-OperationStatus –WaitToComplete
#Move staging to production, this will actually swap them over Get-HostedService -serviceName $azureservice -subscriptionId $azuresub -certificate $azure_cert | Get-Deployment -slot staging | Move-Deployment | Get-OperationStatus –WaitToComplete }
The last step is to deploy the application to Azure by uploading the package, start the environment and switch VIP. I will extend this by running a couple of sanity checks before I switch the production environment, to make sure that I'm not deploying an YSOD. I hope that you'll do that too.
That's it! You have now automated your deploy to Azure. My deploy script takes about 7 minutes to run on a good day.