
How to guest post on this blog
Have you been wondering if you are able to guest post on this blog? Well, of course you have, and this is both supported and appreciated.
The benefits for guest blogging is of course to promote your own online presence by writing for my audience. And my benefit is that I get more visitors to this blog.
This is a guide on how to guest post on this blog.
Prerequisites
Before you do anything you should get in contact with me and just tell me about the subject that you'd like to write about.
Then you need the following
This guide will be based on Ubuntu 14.04, but writing a guest post could be done as easily with Windows or Mac OS X
- Ubuntu 14.04, native or VM doesn't matter
- Ruby 2.2.3 development environment (these instructions for installing Ruby using rvm are pretty great)
- Git (
sudo apt-get install git)
Guide to writing a guest post on this blog
As I mentioned earlier, you would like to contact me before you start doing this, so that it won't turn out that I have to decline your post because I don't think it fits on the blog. Here are a few hints
- The post should be technical in nature. It doesn't have to involve code, but it should be about something technical
- The post should not be a showcase of a product
- The post should present a problem and show how it is solved
- Examples are good, images are great and code is tremendous
Examples of bad posts would be
- Not Technical: Here are some images of my cat
- Not a showcase: All the features of new Visual Studio 2016
Examples of good posts would be
- Present a problem: My blog post not appearing in the Google Search result
- Guides: Beginners guide to the Ada programming language
- Troubleshooting: Windows crashing with error 0xA00000F2
Setting up the blog development environment
This blog is a statically generated site using Jekyll. This makes it very easy to setup anywhere as there is no database involved. Only text files in a folder.
First step is to login to GitHub and fork the blog to your own repository.
Click the Fork button in the upper right corner.
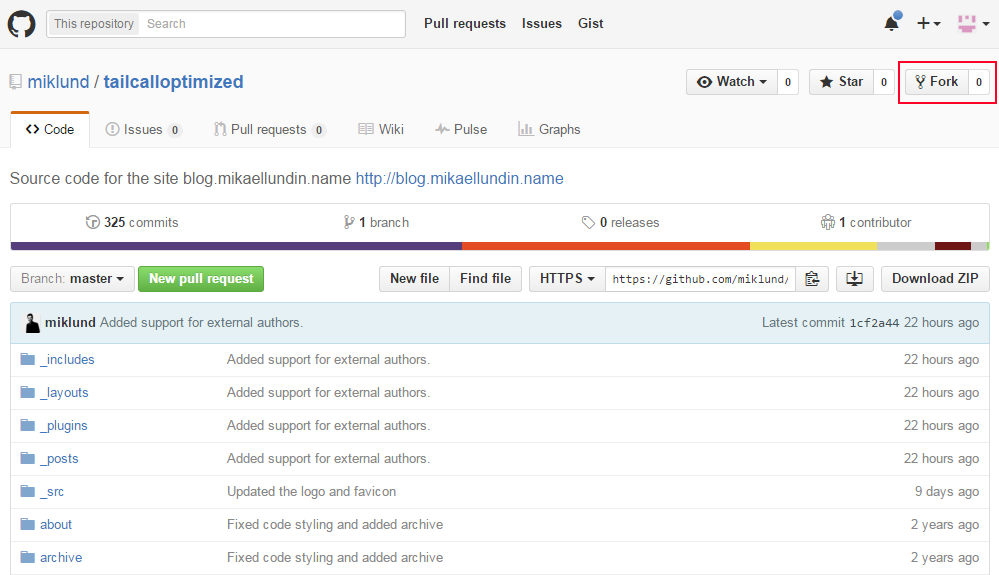
Now you have a version of this blog in your repository and you can clone it to your computer.
git clone https://github.com/rubriks/tailcalloptimized.git
Now that you have the blog on your computer, you need to install some prerequisites in order to run it. Run the following commands in the root folder of the project.
sudo apt-get update && sudo apt-get install -y nodejs npm git-core curl zlib1g-dev build-essential libssl-dev libreadline-dev libyaml-dev libsqlite3-dev sqlite3 libxml2-dev libxslt1-dev libcurl4-openssl-dev python-software-properties libffi-dev libgdbm-dev libncurses5-dev automake libtool bison libffi-dev libgmp-dev bundler rake

bundle install
sudo ln -s /usr/bin/nodejs /usr/bin/node
npm install
sudo npm install --global bower gulp
bower install
Now you will compile the static assets by running gulp.
gulp
Once this is complete you can build the HTML and run the server.
jekyll serve --watch --incremental
It might take a while to generate HTML the first time, but after it is done you should be able to browse the site on http://localhost:4000.
Create a new blog post
There is a helper rake task for creating new blog posts.
rake posts:new POST_NAME="How to guest post on this blog"
This task will create a new git branch, scaffold a new post and make an initial commit. You can now open and start editing your new post.
vim _posts/2016-01-19-how-to-guest-post-on-this-blog.markdown
You will see a YAML header where you will fill in meta information about your post.
---
layout: post
title: "How to guest post on this blog"
description: Anyone is allowed to write a guest post on this blog. Here is how you easily get setup to test the blog out locally and getting started writing your first post.
date: 2016-01-19 20:59:19
tags: blogging, jekyll, github
assets: assets/posts/2016-01-19-how-to-guest-post-on-this-blog
image: assets/posts/2016-01-19-how-to-guest-post-on-this-blog/title.jpg

author:
    name: Mikael Lundin alter ego
    email: hej@mikaellundin.name
    web: http://replay.mikaellundin.name
    twitter: rubriks
    github: rubriks
    linkedin: rubriks
---
There are some things to note.
- Make sure you write a 100 character long description about the post.
- E-mail is not displayed anywhere but used to generate the appropriate Gravatar.
- If you don't want to display web, twitter, github or linkedin, remove those rows completely.
The title of your post is outputted automatically as H1. Everything you write below the YAML header should be markdown and is the contents of your blog post.
Images or other file resources should be stored in assets/posts/2016-01-19-how-to-guest-post-on-this-blog folder.
Code is usually included as a gist by using the following filter.
- {% gist miklund/e642f787e125905a04da transform.fs %}
But if you only need to include a line or two, it is easier to use the code block markdown.
Submitting the post for review and publishing
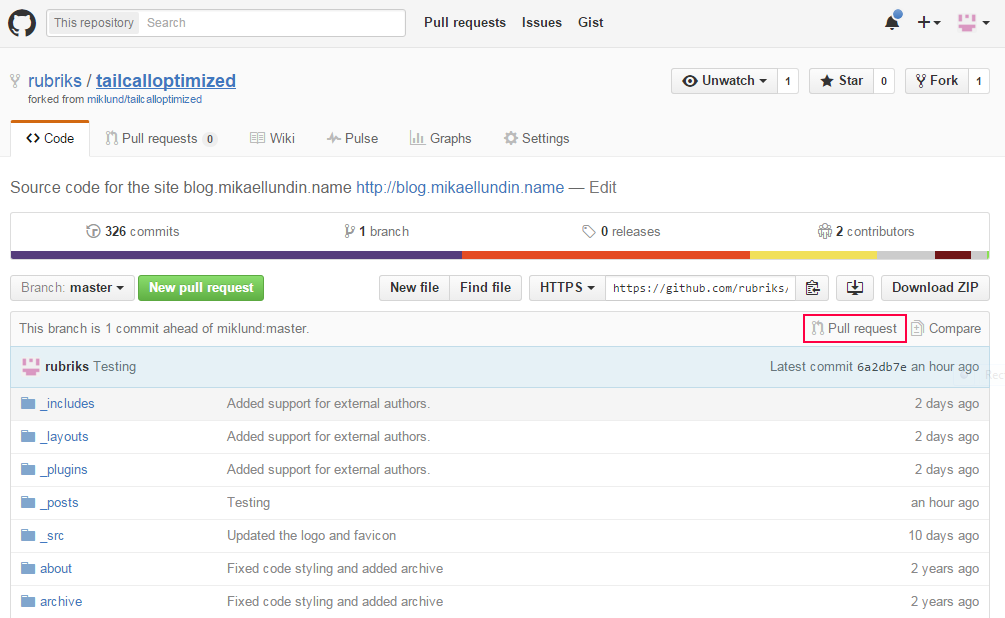
When you're done and have verified in Jekyll that the blog post looks ok, you want to push the code and make a pull request.
Commit the code, merge it down to master and push it to github.
git commit -a -m "2016-01-19-how-to-guest-post-on-this-blog: Finished."
git checkout master
git merge 2016-01-19-how-to-guest-post-on-this-blog
git push
Go back to Github and you will be able to click this button to issue a pull request.
Once that is done, I will take over and get that post reviewed and published in no time.