
Create your own custom NUnit build activity for Team Build 2010
There was an awkward moment when I realized that TFS 2010 does not support proj build files anymore. Now you're supposed to use Workflow Foundation for managing Team Build. Sadly, we have a quite big and complex build setup that we had to convert. Setting up such a build is not easy, and writing your own custom build activities (previously known as build tasks) is not trivial. That's why I would like to guide you through how it's done.
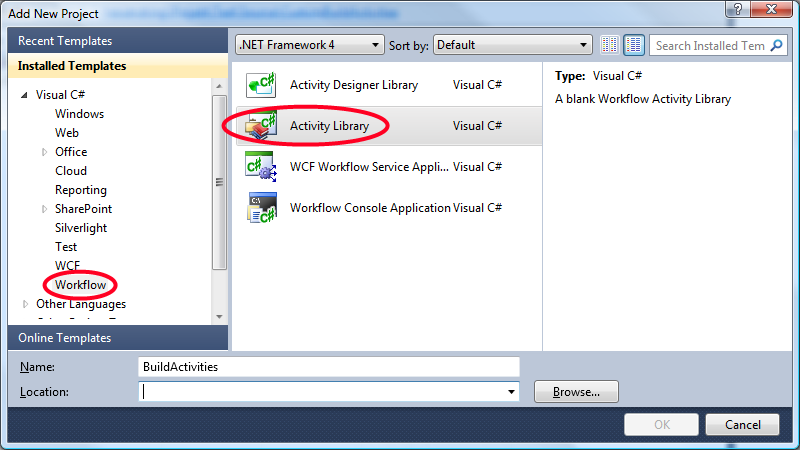
Create a new build definition
Creating the build definition works much the same as it did with TFS2008. Right click on Build in Team Explorer and select "New Build Definition". For this tutorial I will create a new Contiuous Integration build. The interesting part about this dialog is the "Process" screen. Here you can specify input arguments to your build process, which is very useful. Make sure that you create a copy of the Default Template to build your custom build upon.

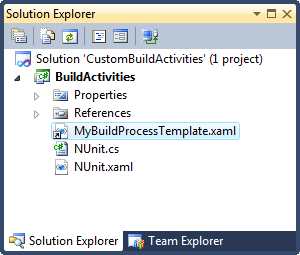
You can now edit your build activity by just double clicking the xaml file in the source control explorer. Neat!
Create your custom activities project
Building custom activities is easiest by creating a new Workflow Activities Library project.
Make sure that you Add References from your project to the following
- Microsoft.TeamFoundation.Build.Workflow
- (C:\Program Files\Microsoft Visual Studio 10.0\Common7\IDE\PrivateAssemblies\Microsoft.TeamFoundation.Build.Workflow.dll)
- Microsoft.TeamFoundation.Build.Client (C:\Program Files\Microsoft Visual Studio 10.0\Common7\IDE\ReferenceAssemblies\v2.0\Microsoft.TeamFoundation.Build.Client.dll)
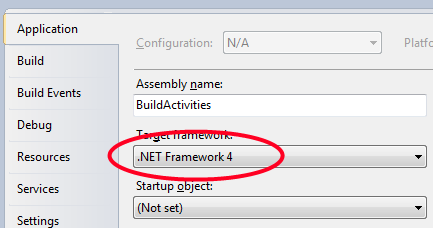
You should also change the Target framework of your project to .NET Framework 4. (it is .NET Framework 4 Client Profile) by default.
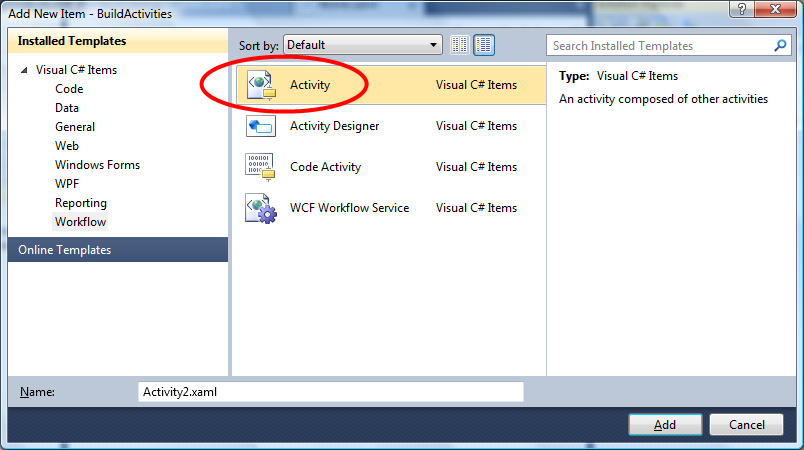
Create your first custom activity
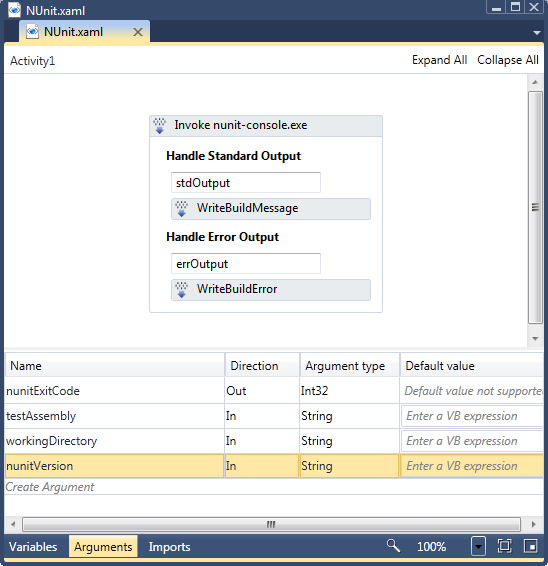
I want to build an NUnit test runner activity, so I will name my first activity NUnit. Right click on your project and Add a New Item. In the Add New Item dialog select Activity.
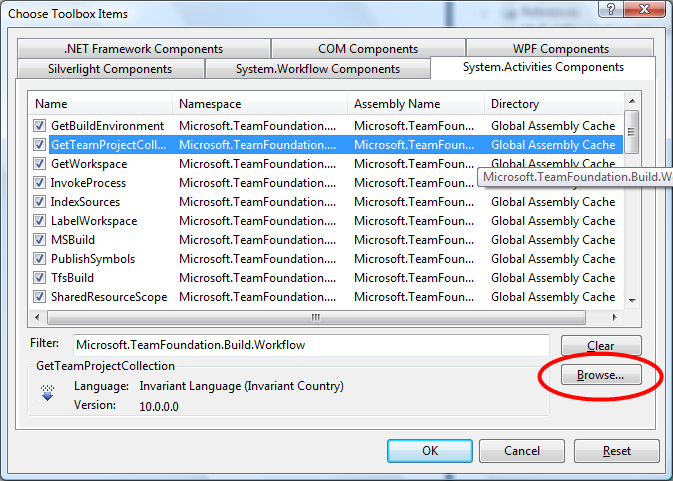
You should prioritize Activities before Code Activities for Team Build as it will have an easier time to stop a build with xaml Activities. In the Toolbox you will find several standard Activites that comes with .NET. Add the Team Build activites by right clicking on the Toolbox and select "Choose Items". Under System Activities Components you can browse for Microsoft.TeamFoundation.Build.Workflow and add those Activities to the Toolbox.
Once in Toolbox, drag the InvokeProcessActivity onto the workflow.
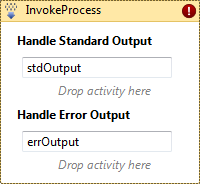
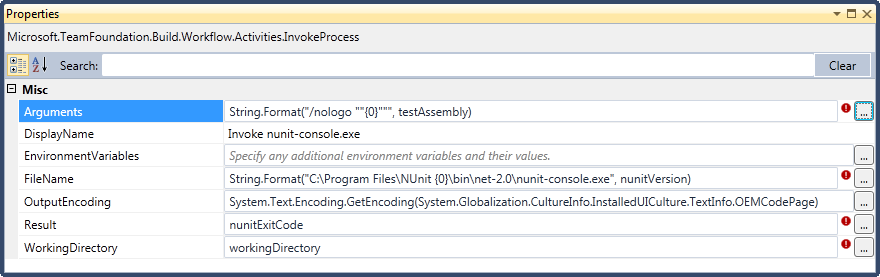
I set its properties like this.
A few things to note
- The argument testAssembly in "Arguments" will be supplied as an argument to the custom activity
- I choose to assume that NUnit is installed in its default location. A more ideal situation would be to take path to nunit-console.exe as an argument to the custom activity, since it could be checked in with the source code. (which you would do if you expect a certain version of NUnit or can't install it on the build machine)
- nunitExitCode is the argument output that tells the build how the unit test session went. 0 is ok, and everything else is an error.
- Working directory is also supplied as an argument
Custom activity arguments
So we need to specify arguments for this custom build activity.
Also notice that I've added "WriteBuildMessage" and "WriteBuildError" to the Invoke activity. This will log everything that NUnit write to the build log. Handy when you need to follow up on errors.
Add the custom activity to your build
Before we add the custom activity to your build we need to create a partial code behind file. Don't ask me why, but Team Build will not accept your activity without it. Go ahead and create a new class that looks like this.
namespace BuildActivities
{
    [Microsoft.TeamFoundation.Build.Client.BuildActivity(
        Microsoft.TeamFoundation.Build.Client.HostEnvironmentOption.All)]
    public partial class NUnit
    {
    }
}
This will enable Team Build to load your custom activity as a build activity. Compile your project and open up your team build process.
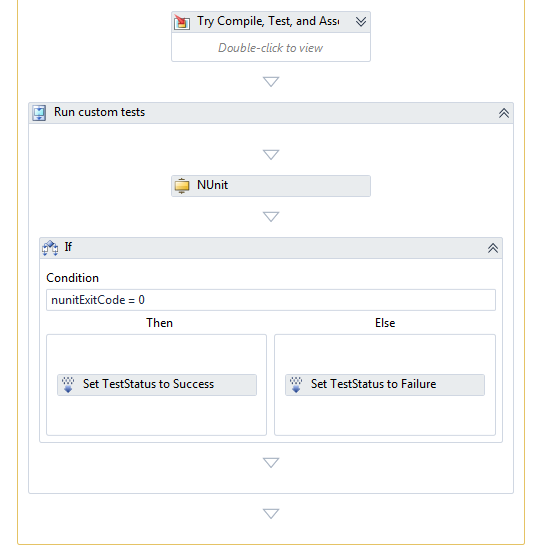
Add your task to "Run On Agent". If you're unable to add your task, there's a trick of adding the build process xaml to your project with "Add Existing Item ... As Link". After recompiling you should be able to add your custom activity to the build process.
Tell Team Build about your custom activities assembly
Last you need to tell the Team Build Controller about your custom build activity. Right click on the build node in Team Explorer and select "Manage Build Controllers".
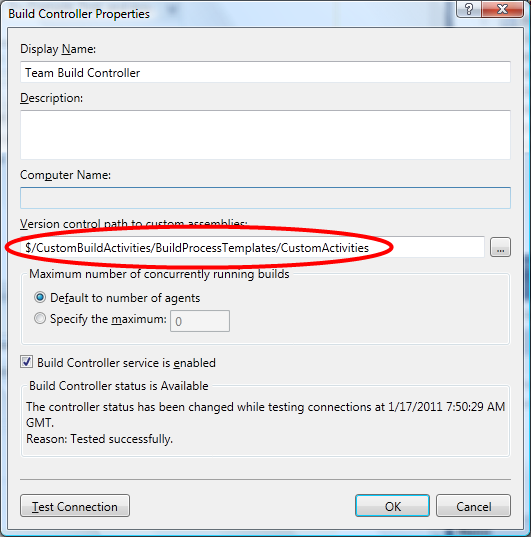
Copy your assembly to that directory and check it into source control. Congratulations! You have created your first Team Build Activity. Let it not be your last!
Salutations!
I would like to share a link to Ewald Hofman's excellent guide to Team Build 2010 as it has helped me a lot in my struggles. His tip about using executing powershell scripts from Team Build is very useful. http://www.ewaldhofman.nl/post/2010/04/20/Customize-Team-Build-2010-e28093-Part-1-Introduction.aspx